Quick Tips For the Kasa Smart Plug KP200 Setup
The current digital landscape has witnessed a dramatic surge in smart home technology. Various smart home devices like Kasa smart plugs make life more convenient and easier through their remote control and automatic scheduling features. If you are planning to buy this efficient device for your smart home, you must walk through this Kasa Smart Plug KP200 Setup guide. From setting energy-saving routines to controlling your smart appliances remotely, you must set up this smart gadget. Therefore, walk through this post to know the quick steps of setting up the Kasa KP200 plug.
Pre-Setup Requirements
To begin the smooth Kasa Smart Plug KP200 Setup, you must ensure that you have the necessary things ready with you. So, you must gather:
- A working 2.4GHz Wi-Fi network
- The Kasa Smart app
- A compatible smartphone
- Correct login details
- A screwdriver for electrical box access
- Basic understanding of electrical wiring
- A neutral wire (required for KP200), etc.
Important Note: Cut off the power supply directly from the main circuit before starting any electrical work.
A Complete Kasa Smart Plug KP200 Setup Process!
Now that you have all the essential things with you. Hence, follow the step-by-step instructions to set up this smart plug seamlessly:
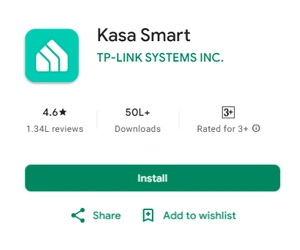
- First of all, install the Kasa Smart app on your smartphone.
- After that, launch the app and create an account (for new users).
- If you already have an account, log in using your registered TP-Link ID.
- Then, you will enter the Kasa app dashboard.

- Hereon, tap on the “+” button in the app and then Smart Plug>Smart Outlet.
- Then, follow the on-screen instructions to link your device.
- Hereon, you can check your device status, set schedules, timers, set away mode, create scenes, etc.
- Further, name your device, and you can start controlling and managing your devices remotely.
- Finally, the Kasa Smart Plug KP200 Setup is finished.
Common Troubleshooting Tips
Sometimes, even with careful setup, issues can arise during this configuration. The main culprits behind these issues are poor internet, app issues, firmware issues, etc. So, here are some quick fixes:
- Firstly, if your plug is not responding, ensure power is restored and Wi-Fi is active.
- Then, try restarting the plug by unplugging and plugging it back into the power supply.
- Most importantly, make sure you’re using a 2.4GHz network.
- Place the smart plug close to your router during setup.
- Regularly clear the app cache and disable security extensions.
- Always check the firmware updates and app updates, and use the latest versions.
- If issues persist, reset the Kasa smart plug.
On the Whole
All in all, the Kasa Smart Plug KP200 Setup may seem complex at first, but with the right instructions, you can easily accomplish this process. From requirement gathering to the configuration of preferred settings, you have now learned everything to set up your smart device. So, take control of your appliances today and experience a convenient & connected home.